Published: 2/17/2006
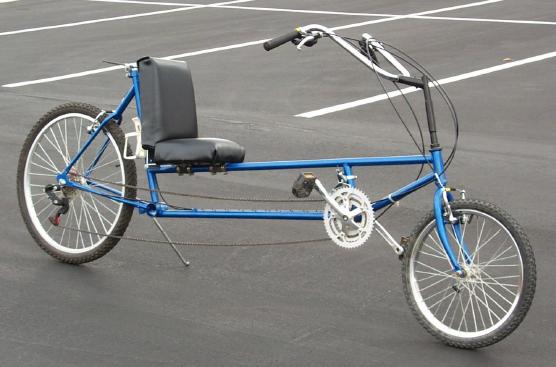
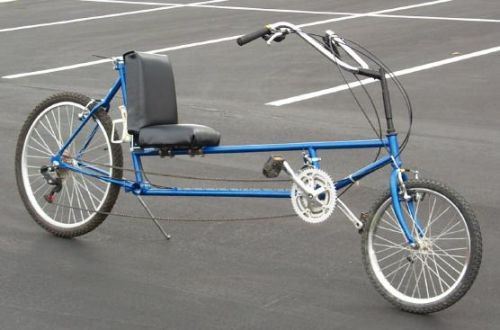
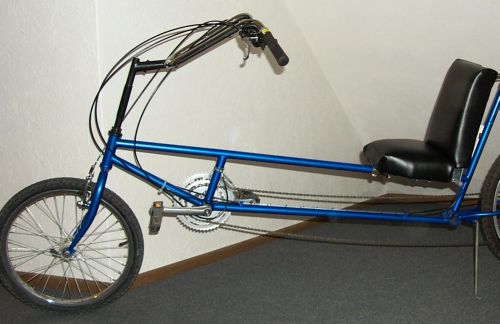
This is my first attempt at designing and building a recumbent bike. It’s a long wheelbase design, about 8ft long, and weighs about 40 pounds. It’s a blast to ride! On the pages that follow are some notes on its construction and photographs in case you’re looking to build a bike yourself. If you do make one, I look forward to hearing about it.
I started in April of 2000 and in November I called it workable as the winter rolled in. Initially, I planned to reuse old bike parts collected from garage sales whenever possible, but as I went along, the reused parts became scarce, due to quality issues and the fact that many department store bike parts aren’t compatible with the standard components. Besides, I wanted to leave myself an upgrade path by using standardized components that can be replaced. The rear triangle, front wheel and tire, front fork, front derailer, rear tire and stem were salvaged from old bikes, notably my 26″ Huffy Caribou MTB that I’d had since I was a kid. I couldn’t stand to part with it, so parts of it live on. I recently acquired a Sun EZ Speedster CX, so this is now my wife’s bike.
Design
- Long Wheelbase (LWB) format
- Steering type: Above-seat steering
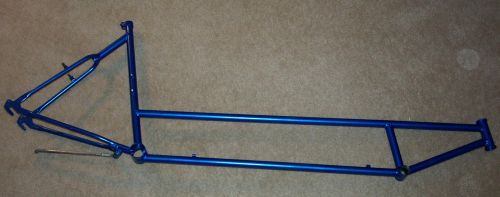
- Frame: 4130 Chromoly (o.d. 1-1/8″ wall thickness .035″)
- Construction: TIG welded
- Paint: Blue metallic flake lacquer with clear coat
- Seat: Plywood, 3″ high-density foam, vinyl
- Wheels: (f/r) 20″/26″
- Brakes: (f/r) Diatech VC711 V-brakes and Diatech DP6 levers
- Crank Set: Dotek 52/42/32
- Pedals: Basic MTB platforms
- Bottom Bracket: Shimano Alivio
- Chain: Shimano HG50 (three of them)
- Derailers (f/r): Shimano/SRAM Centera
- Shifters: Shimano 7-sp Rapidfire
- Cassette: Shimano Nexave 7-sp. 11-34
Specifications
- Wheelbase: 73″
- Length: 96″
- Weight: 40lbs
- Weight distribution (f/r) 42%/58% (with me as the rider)
- Seat Height: 19.5″
- Bottom Bracket Height: 14.5″
- Head Tube Angle: 70 deg
- Trail: 1.5″
- Gear-inch range: 24-112 gear inches
Possible improvements
- Better chain management – I’ve added a chain tube on the slack side
- Lighter seat
- Clipless pedals
- Better tires
Frame
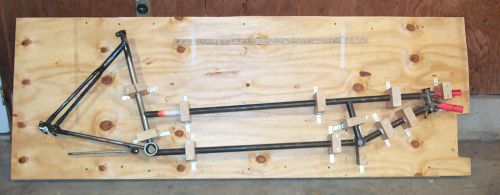
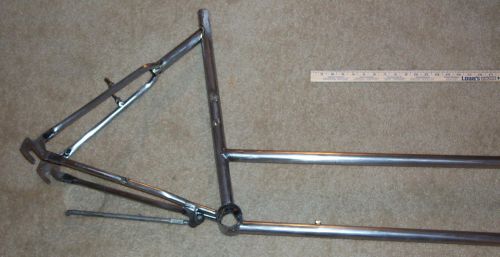
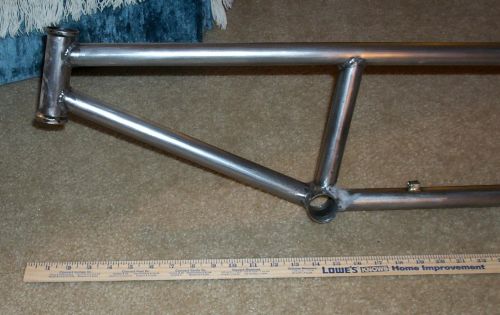
The frame is built using a head tube and rear triangle from donor bikes. The remainder of the frame is made from 1-1/8″ chromoly tubing (.035″ wall thickness). Using the rear triangle from an upright bike made the rear of the bike much easier to build.
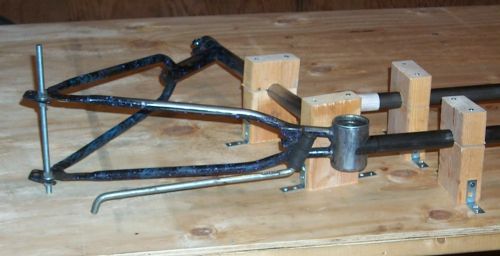
I constructed a jig from plywood and 2×4 blocks used as risers. I also used a piece of all-thread and a couple of nuts to hold the rear dropouts at the correct height and at the correct spacing during welding. A little math and a hole saw are all that I needed to ensure that the wood blocks were of the proper height to keep the frame in alignment. By the way, I recommend bracing the plywood with a few straight boards to keep it from sagging. Even a small fraction of an inch of sag would be a detriment to the straightness of the frame. I fastened the whole frame together, threw it in the back of the truck and had a local welder TIG weld the frame for me ($30).
After welding, it was time for hours and hours of additional paint removal, cleaning up the bare metal, applying bondo, grinding the welds, etc. I had my dad braze on the cable guides, rear cantilever pivots, water bottle bosses, and a couple of cable stops. He has access to a oxy-acetylene brazing rig. I might try my hand at brazing next time, but I don’t think I’ll tackle fillet brazing just yet.
Paint
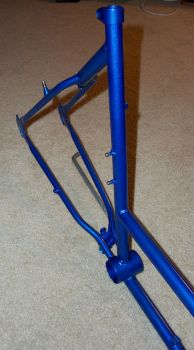
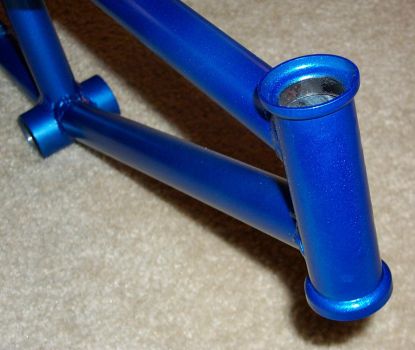
I had the good fortune of an early November that was unseasonably warm, allowing me to get my painting done before the cold weather prevented the paint from drying properly. I sanded the entire frame with 400 grit sandpaper, followed by a couple of coats of sandable primer. Sanding between coats, I then applied about 3 coats of color, a metallic flake blue automotive lacquer. I finished up with several clear coats to protect the relatively soft color coats.
Seat
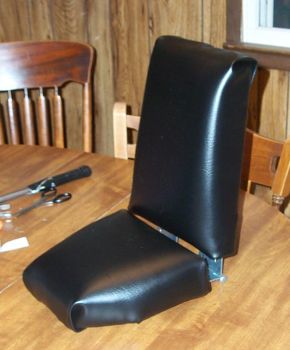
My first attempt at a recumbent seat yielded a heavy (7 lbs) yet comfortable seat. I really didn’t have any idea how much force I would be applying to the seat as I pedaled, so basically I overbuilt everything.
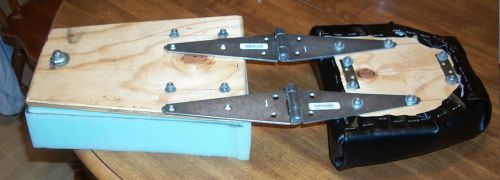
I began with 1/2″ plywood, from which I cut two pieces, for the seat base and seat back. Then, I rounded the edges with a router and drilled the holes for the bolts that hold the metal pieces to the plywood. Next, I cut out some 3 inch high-density foam to the shape of the back and the base, and covered with a thick vinyl, attached by heavy-duty staples. Note: the bolts must be in place before you cover the plywood, otherwise you’re out of luck. The seat back and base are held together with large strap hinges like you would use for a gate in a fence. I now believe the ones I chose are a bit of overkill.
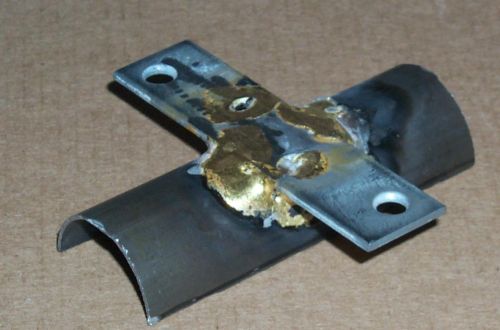
The seat base is mounted to the top tube using the very basic half-tube and hose clamp method. I cut a short length of tubing (the same diameter as my top tube) in half length-wise and brazed it to a small mending plate. The mending plate is bolted to the seat base. The half-tube sits on top of the frame and is held on by two hose clamps. I used a piece of old innertube to protect the finish on my frame, and it also helps add a bit of grip. Two of these assemblies hold the seat base to the top tube.
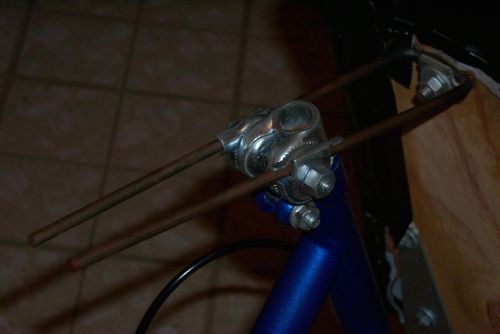
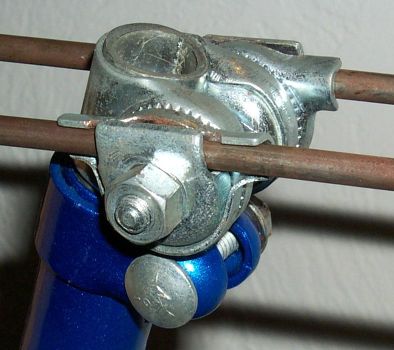
The method I used for mounting the seat back is one of the few ideas that I came up with on my own. I’m happy with the way it works, though. First, I took a piece of 1/4″ steel rod and bent it into a tall “U” shape. Then, I took two saddles from upright bike seats and salvaged the binders that hold the seat to the post. For the first, I left it on the seat post and filed the opening a bit so that they would bite down tighter on the steel rod. I took just one side of the binder from the other saddle and used it to hold the bottom of the “U” to the seat back. By loosening the binders on the seat post, I can tilt the seat fore and aft.
Steering
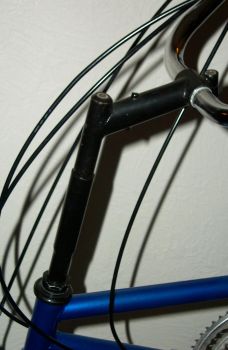
There’s nothing terribly interesting about the steering system on this bike. I used the head tube and front fork from a 20″ mountain bike, and retained the same angle. I didn’t want to introduce a lot of “fork-flop”, and I wasn’t scared of a tiller, so I settled on this design. I purchased a set of hi-rise handlebars from Gaerlan, as well as as a stem riser to end my stem about 6 inches higher. I took a mountain bike stem and turned it around so that the handlebars are closer to the rider. Depending on the height of the rider, the handlebars can be tilted up and down. The result is a very simple layout with just a bit of tiller effect. I looks kind of like a chopper, but I find it comfortable. It also handles well- on my first time out I cranked it up to about 32mph on a flat stretch and I felt just as stable as on my mountain bike.

I found the bike site interesting, and the fact that we have the same last name too!
Your bike was one of the things that inspired me to build my own. Check out
http://www.bentmike.com
What size is your seat…. bottom and top piece.
Do you have a drawing that I can use if I want to build simulare bike like yours.
My name is Tom Abelsson Stationsvägen 5 Västerhaninge. Sweden
Abu Dhabi much appreciate if you could send me your drawings and everything about this because I would like to build a similar bike
Hi Thom – I’m afraid I can’t find any drawings. I added a video, if that helps. Also, if you’re going to make something similar, make sure you either incline the front fork more, or make longer handlebars. Mine ended up not being terribly comfortable in this way. Good luck!
When you say incline the front fork do you mean a steeper Head Tube Angle less than 70 degrees ? Ex: 58 – 65 degrees?
Right, steeper head tube angle. That comes with downsides, too, though, like “fork flop”. But the tiller effect on this bike (large horizontal distance from the axis of the head tube to your hands) is a little weird. Steeper head tube is the easiest solution, but other bikes with this design sometimes use remote under-seat steering. On a linkage or cable.