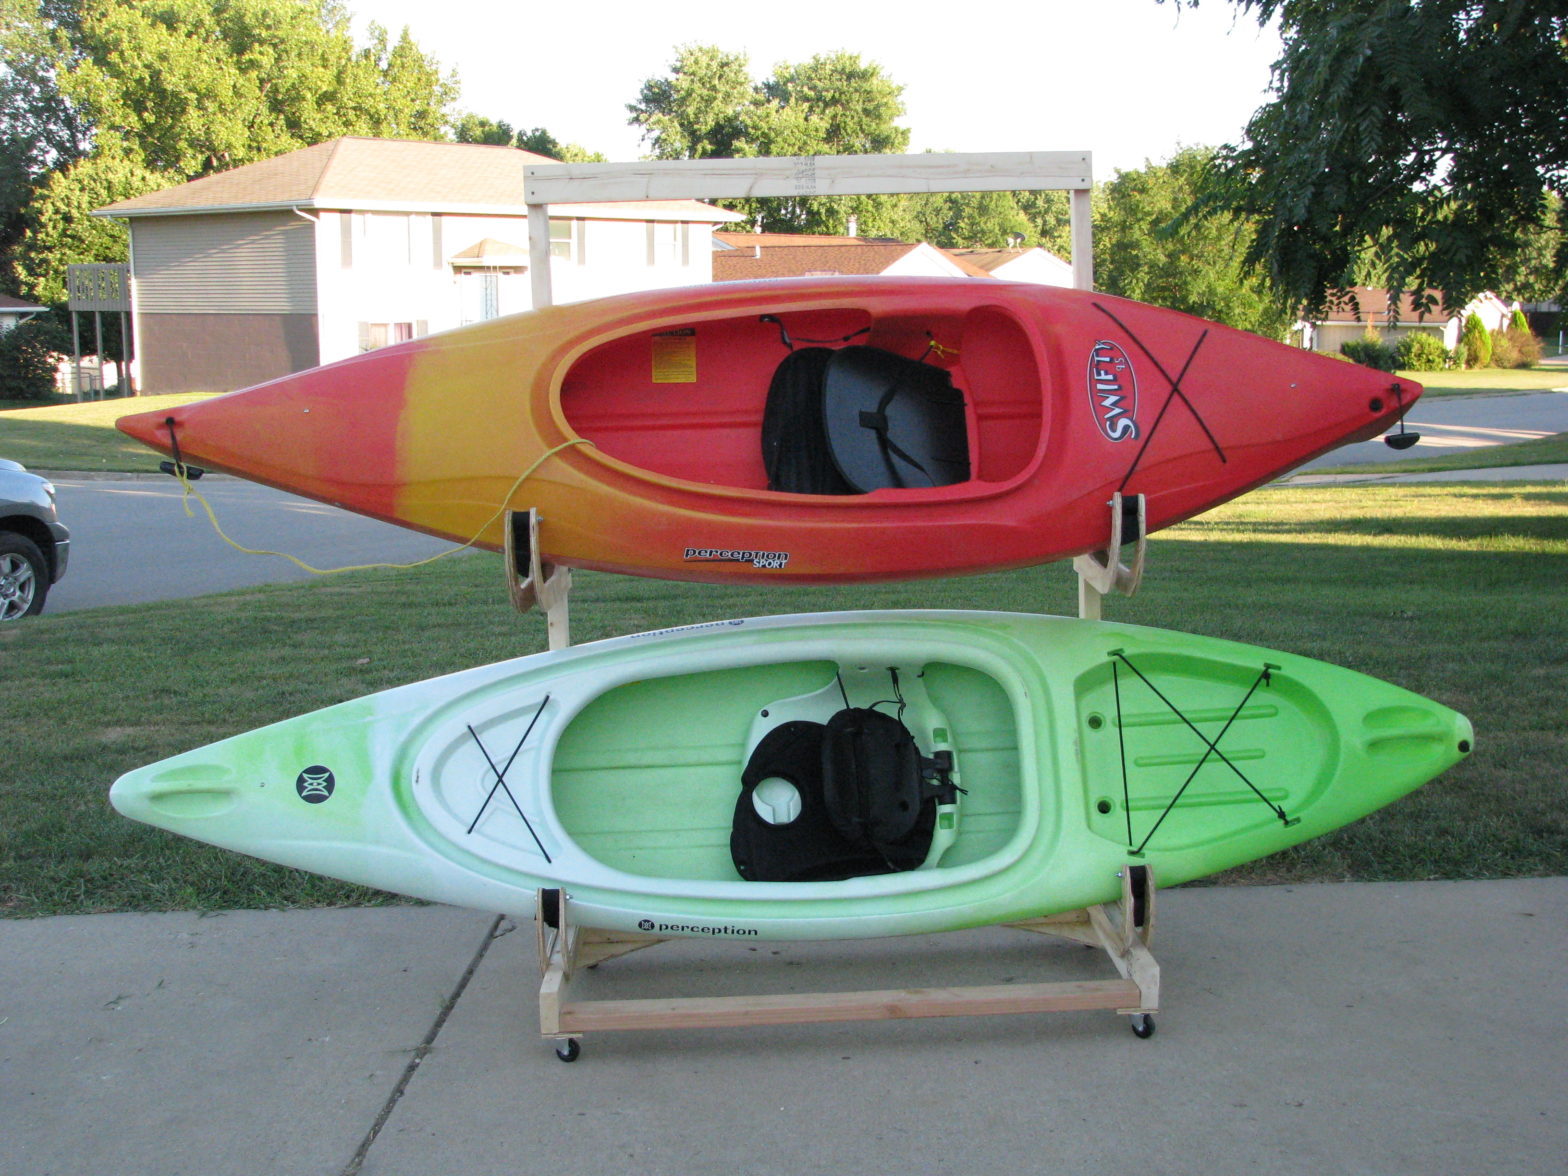
We recently bought a couple of kayaks, so I had to come up with a way to store them. After doing a little research, I determined that storing them on their side, without any hard pressure points, was best. If not stored properly, kayaks can deform.
That said, I’ve since also built another rack that stores boats as if they’re on a car-top stacker, because I’m running out of room!
Some of the storage options I’ve seen use a nylon strap to gently cradle the kayak, since the strap can conform to the contour of the hull. Also, some sources suggest that it’s best to support the middle 40-50% of kayak.

I built this rack for our kayaks for about $50. Since ours are 10 footers, I placed my supports a little over 4 feet apart. The only significant challenge was designing the support brackets that actually hold the kayaks, so that’s what I’ll focus on.
What you’ll need:
- A sheet of ½†plywood
- About five 8ft 2x4s
- 5/16†hex bolts (3 inches long)
- 5/16†washers and nuts
- 1-1/2†wood screws
- Casters (optional)
- 1†dowel
- 1†schedule 40 PVC
- Nylon straps (I found 9ft long 1-1/2in wide straps in the camping section of Walmart).
To make these brackets, here’s what to do.
- Take a sheet of plywood and cut it into 16†x 24†panels. You’ll need 4 panels per boat. With this size, you shouldn’t have any waste.
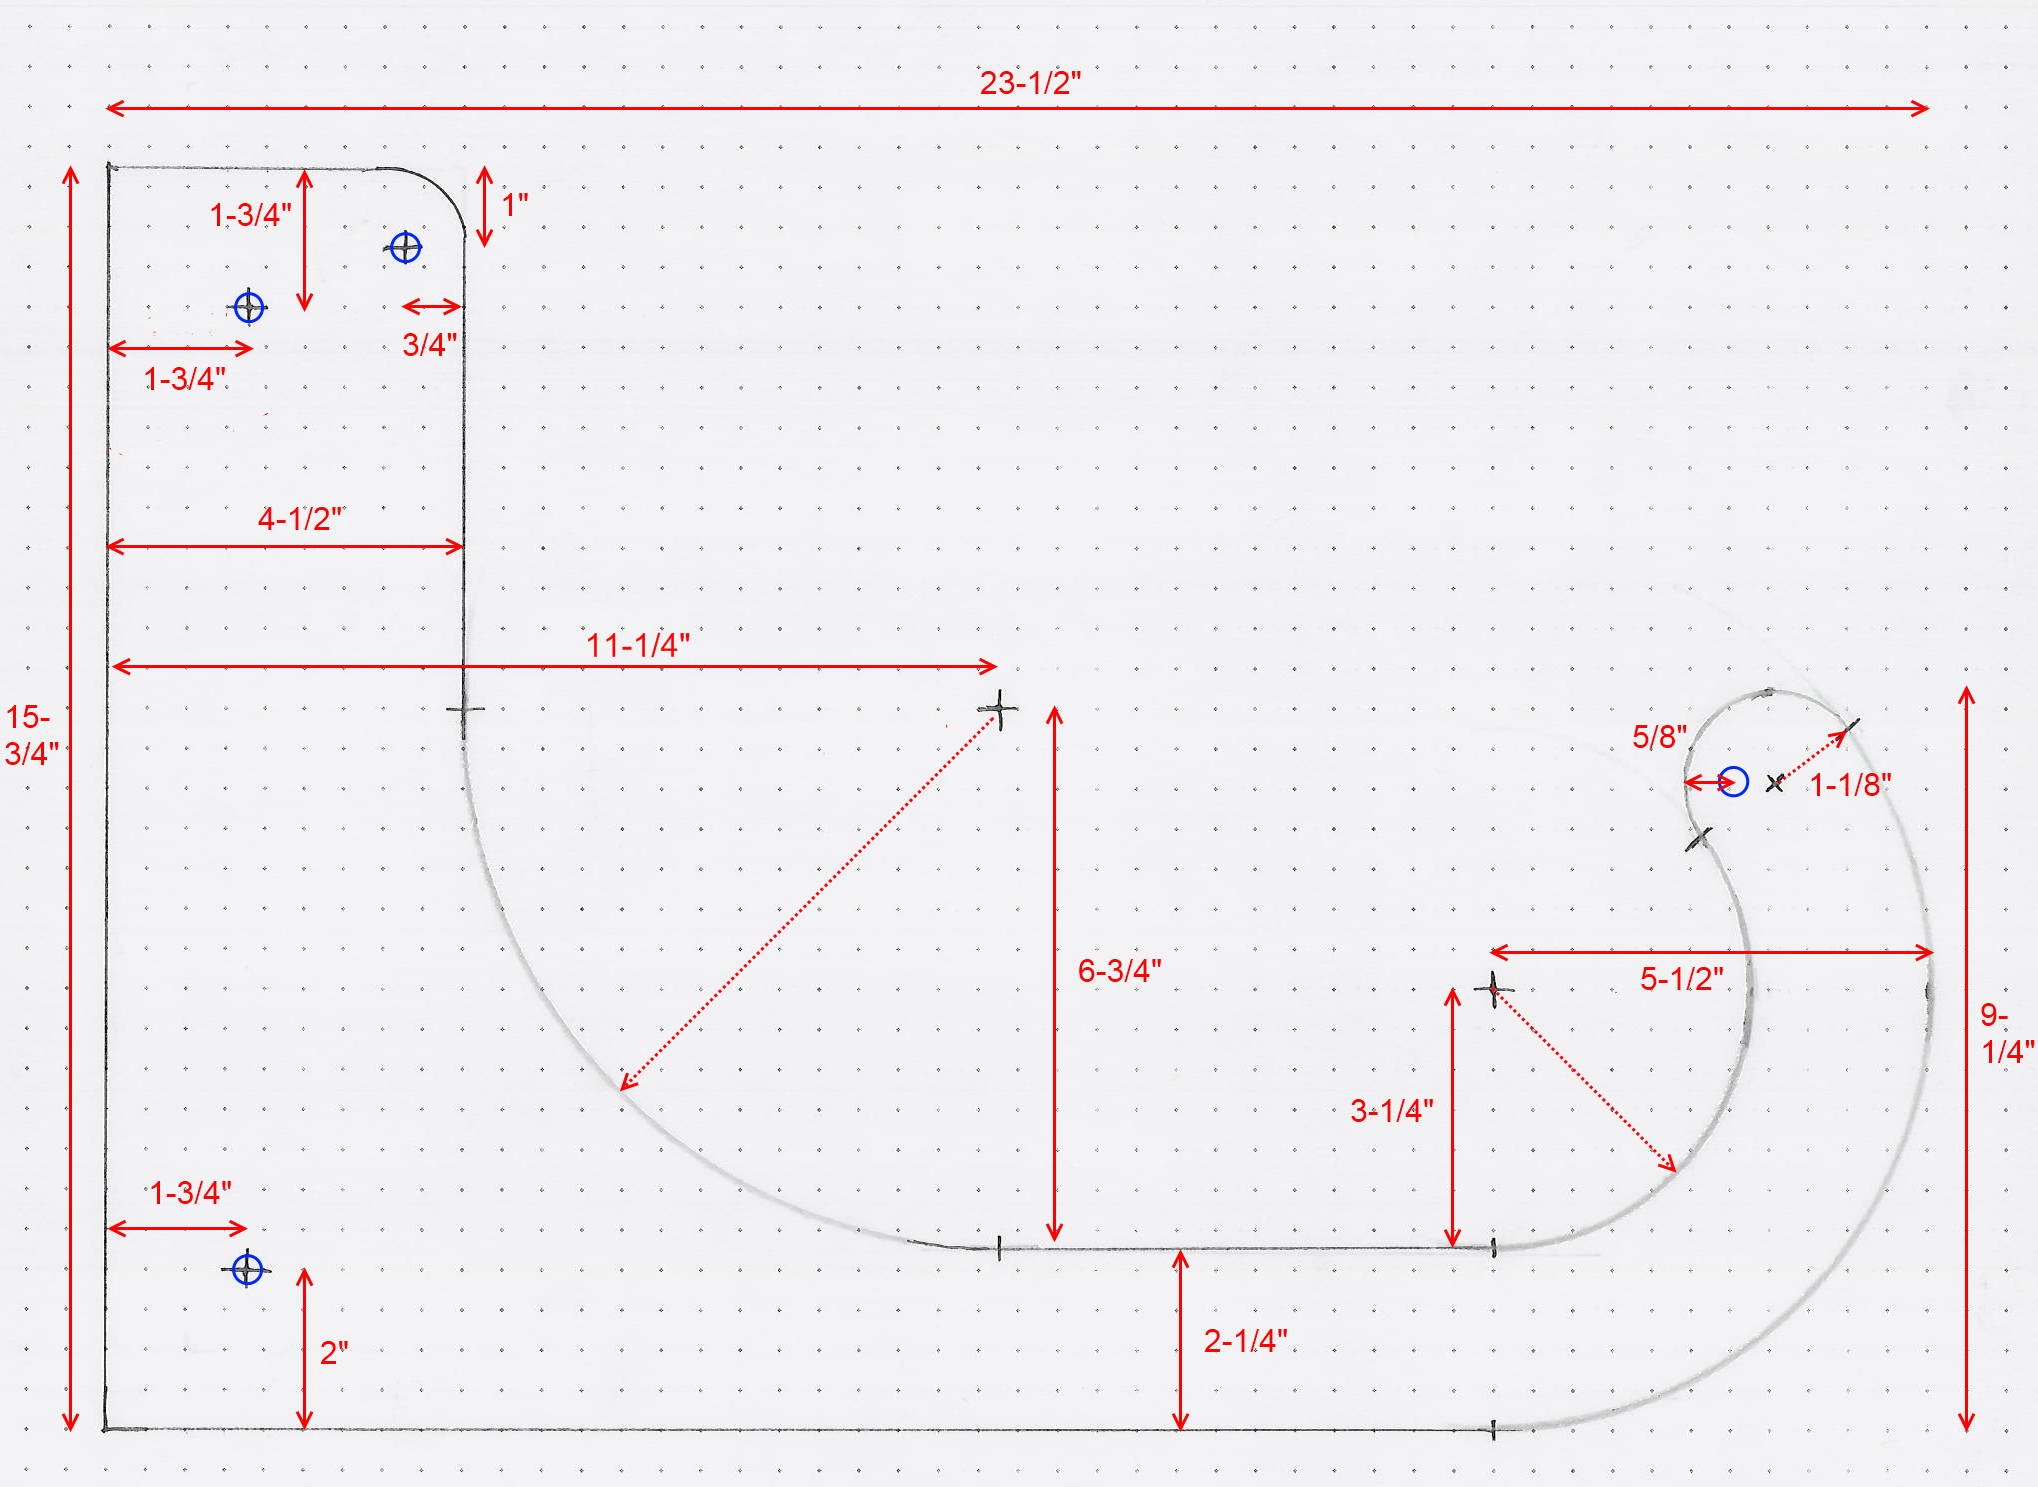
- Cut the bracket shape out of the panel according to the plans below. I used a router, but a jigsaw would work too. I used my router with a trimming bit to duplicate the subsequent bracket pieces.
- Drill the four holes in each bracket piece in the spots indicated by the blue circles. Use a 11/32†bit, which will fit the 5/16†bolts.
- Smooth the edges of each bracket piece with a sander or router.
- Cut the 1†dowel into 1-1/2†pieces, and drill a 11/32†hole down the center. You’ll need 2 per boat.
Cut the 1†PVC into 1-1/2†pieces. You’ll need 2 per boat. - For the nylon straps, you’ll going to need two lengths for each boat. I found 4-1/2 feet to be about right, which works well with the straps I found at Walmart. Cut if needed, and don’t forget to melt the ends and to have a buckle of some sort to attach the two ends together in a loop. My walmart straps had plenty of buckles included.
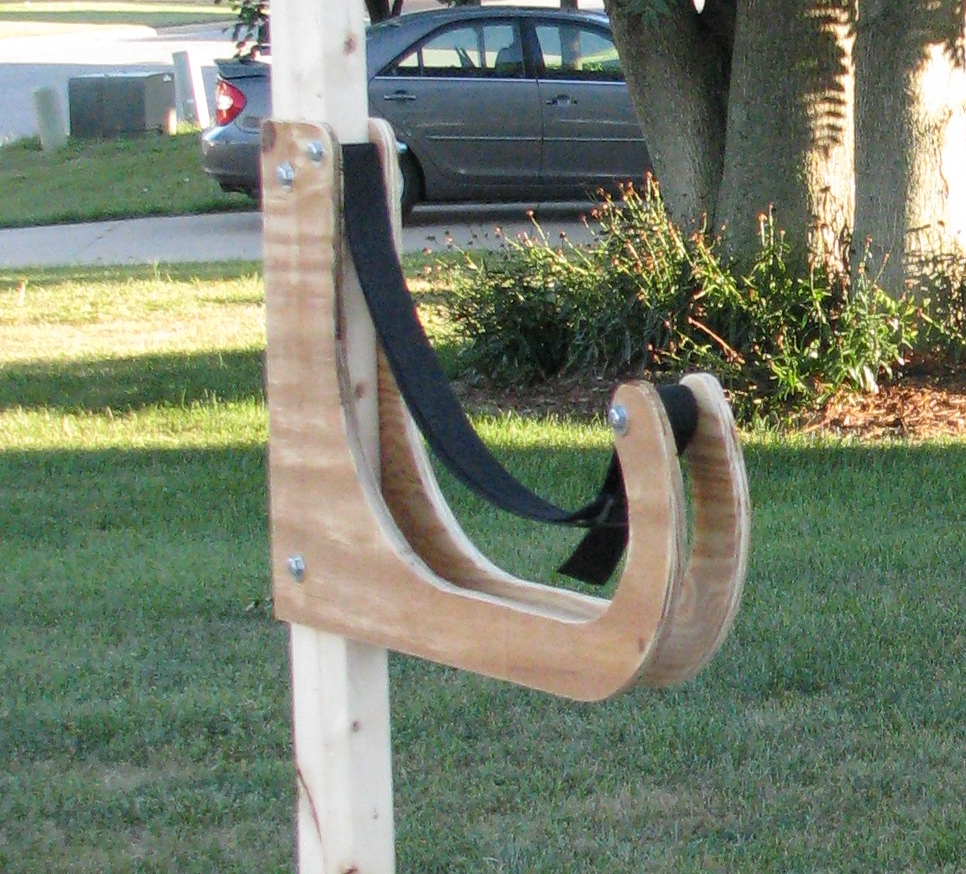
- Run a bolt through the outboard hole in one piece, through your “bushing†(consisting of the dowel piece and the PVC) and finally through a 2nd bracket piece.
- Run another bolt through the top hole, but you don’t need a bushing here.
- Loop the nylon strap between the two bolts.
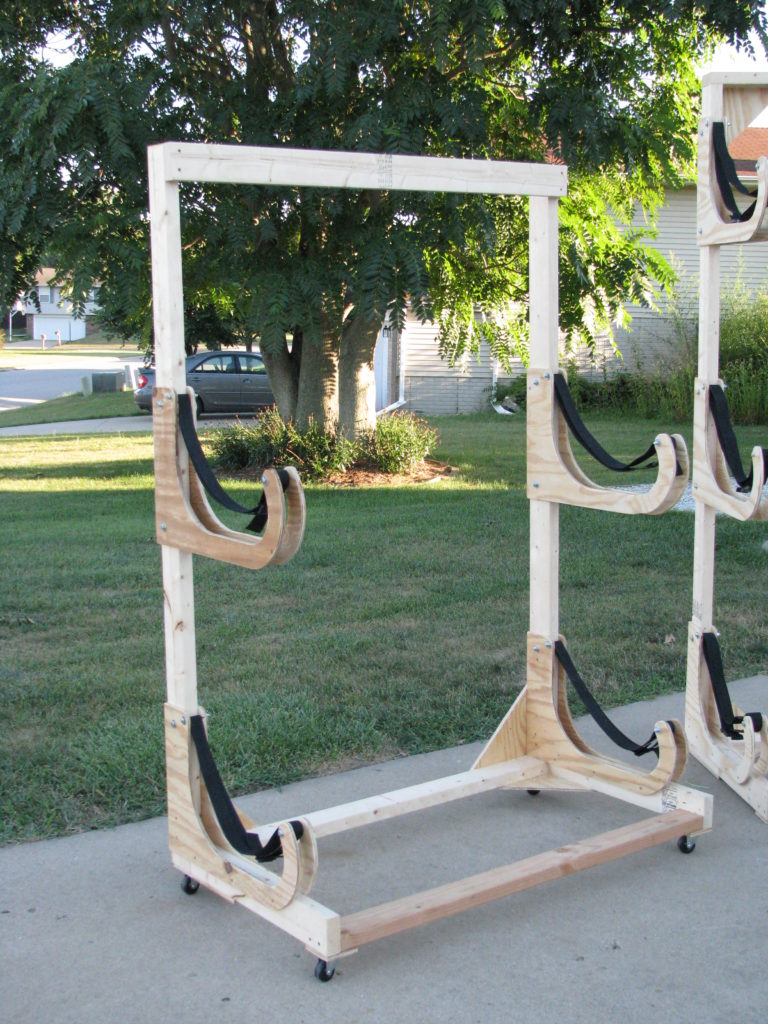
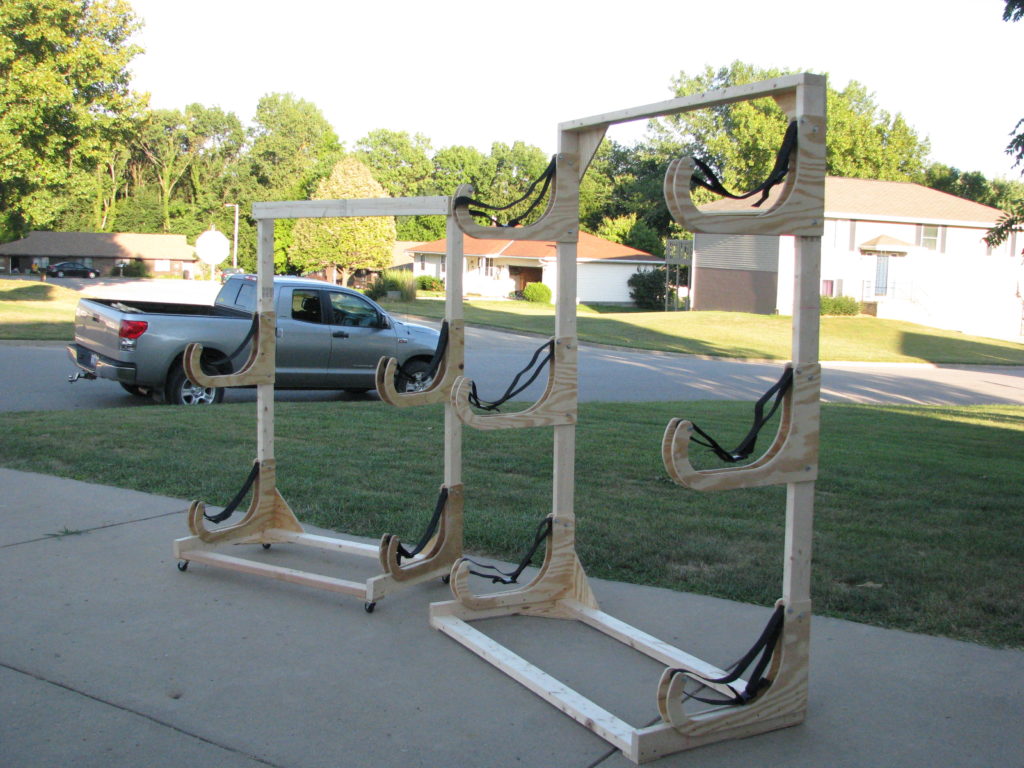
Once you’ve built your brackets, just build a simple 2×4 frame as shown by the photos. You should have plenty of scraps of plywood to cut the 12†triangle gussets for the corners. I used the bottom brackets as the structure which holds the legs in place. The upper shelf or shelves just bolt to the 2×4 uprights at the proper heights. I found that putting each shelf 32†(measured from top to top) apart worked well for my boats.
On my two boat rack, I put a board across the top where I’ll put some hooks to hang my life jackets, etc. I built a three boat rack, shown below, for a friend.
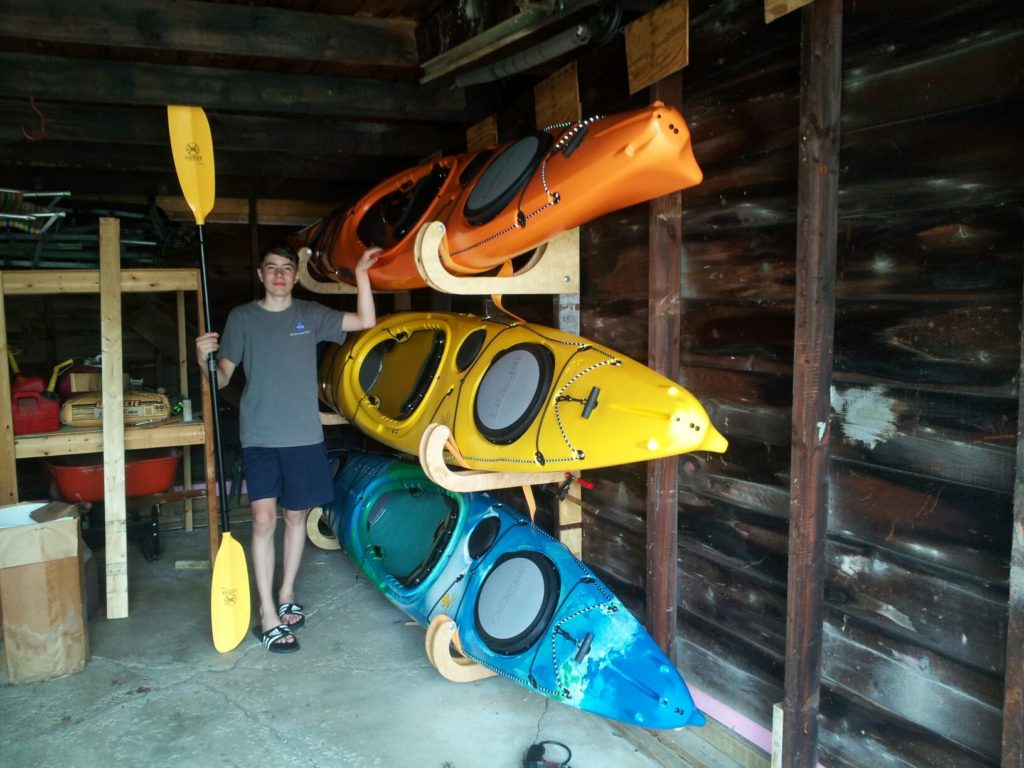
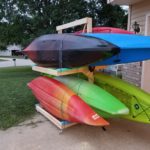
D. Ohmer sent in a picture of the rack he made using these plans. He mounted his straight to the studs in his garage – very nice!
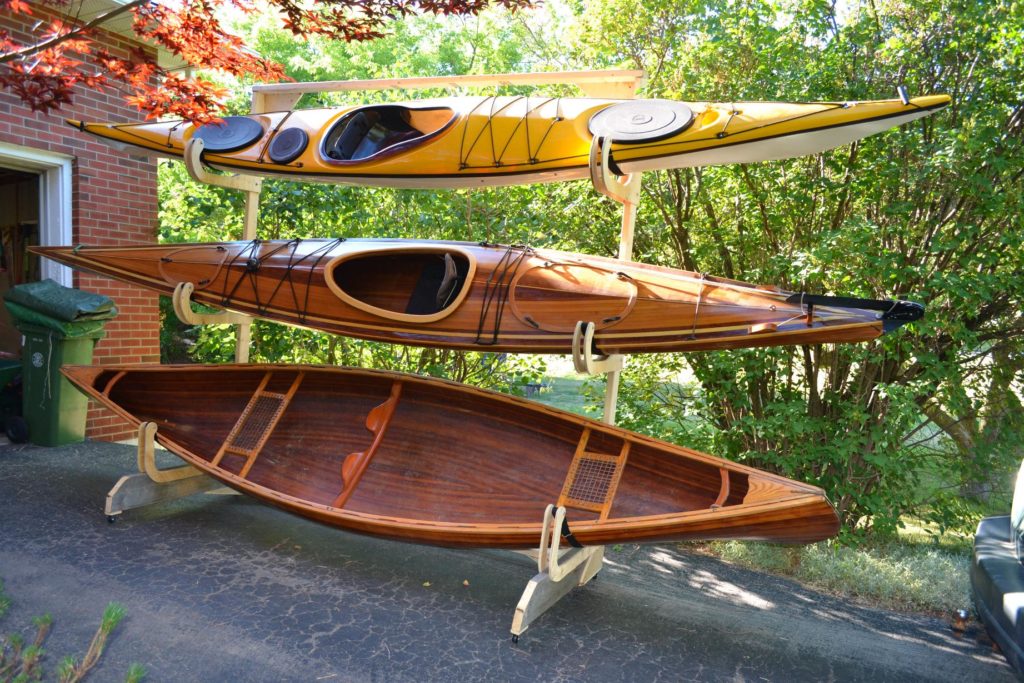
Terry Carleton sent in a picture of his beautiful boats and a modified version of this rack. Note the new dimensions in the comments.
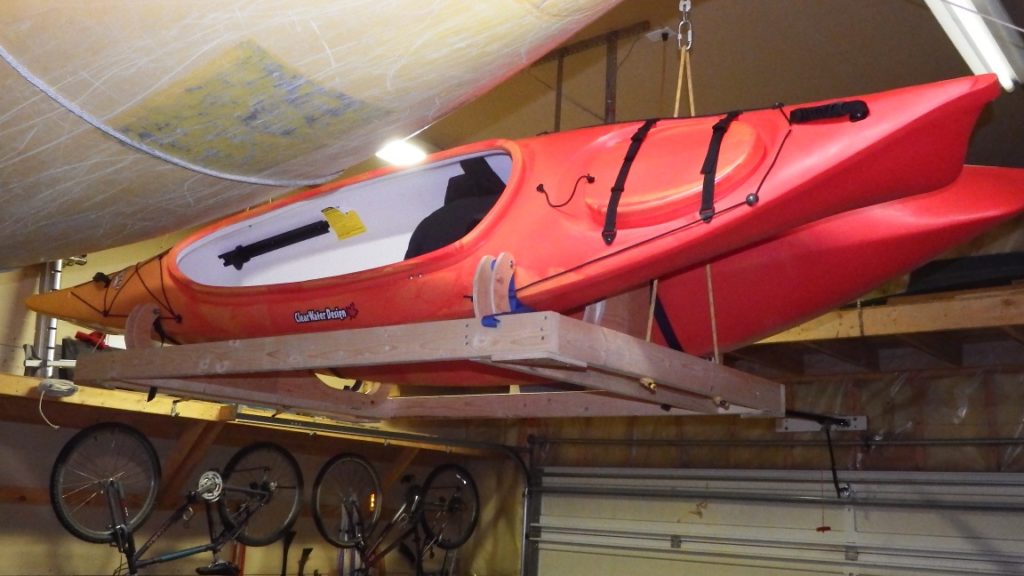
Louis Maisonneuve adapted this design to be hoisted up to the ceiling.
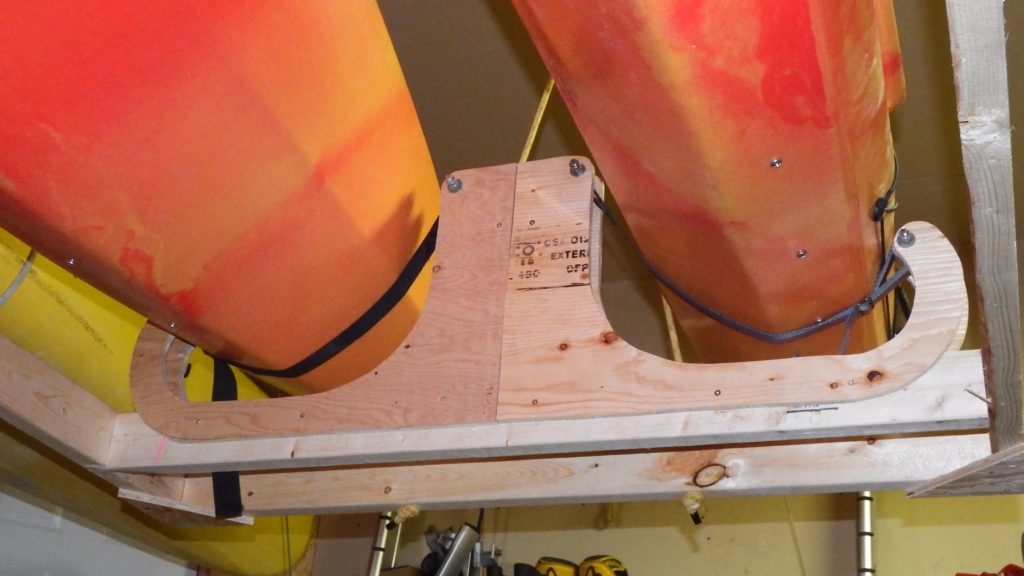
If these photos don’t answer your questions, feel free to drop me a note.


Related Projects
A space-efficient high capacity rack for holding multiple kayaks standing on edge, like on a roof-top stacker
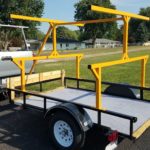
Custom designed kayak trailer, capable of holding 16 kayaks, built on a 5×8 utility trailer
Thank you for showing your rack. I was going mount the yaks on the wall but this is the better and makes it easier to load a 12′ yaks.
Thanks
Excellent design — just what I needed!
Awesome! But do you have any other pictures of the “bushing” thing you describe? I’m not really clear on what that is and why you have them on there. Any detail there is appreciated!
Brian- I don’t have any other photos, but for the “bushing”, just think of a cylinder 1-1/2″ high and about 1-1/4″ or so in diameter. I used a wooden dowel and PVC, but you could do it in many different ways, like just a block of wood. The reason you need it is that without it, the boat will rest against the plywood bracket (because the bolt isn’t right at the edge of the bracket).
This is a great idea, exactly what I am looking for. Thanks for sharing.
I know this article is 12 years old, but I’ve just made 2 of these racks, and they are awesome!
glad to hear it! There hasn’t been a huge technology upgrade since then 🙂
Now the article is 14 years old and still a great solution for a mobile storage rack. Thanks for sharing. The one I built is holding a Hobie Revolution and an Old Town Salty 120.
Hi Korey
I’m going to make a 3 tier for my sea kayaks after seeing your brilliant design. One question, do you have the spacing measurements for the rack that Terry built for his 2 kayaks and canoe?
Thanks
Marty