
Published: 9/21/2009
Introduction
This project was featured on Science Channel’s “What Could Possibly Go Wrong?” in 2015. I think it was was on Season 1, Episode 8 – “Wet and Wild”, but I can’t find it. Let me know if you spot it!
Inspired by the various 2-liter bottle water-powered rockets I’ve seen on the web, I decided to come up with a simple water gun using the same principles.
The resulting water gun design costs about $10-12 in parts and only takes about 30 minutes to build. It’s powered by compressed air, like the old standard “super soakers”, but instead of compressing that air with a hand pump, this design pressurizes the air using the water pressure from a garden hose.
Operation
To fill and pressurize the water gun:
- Attach the water gun to a garden hose (a quick connect makes this easy).
- Close the discharge valve and open the fill valve.
- Turn on the hose (if needed) and wait while the water enters the bottle and plumbing.
- Close the fill valve.
- Disconnect the hose.
To use, just open the discharge valve. Just make sure you keep the water gun basically upright. See the video at the bottom of this page!
Safety warning and disclaimer
If you build a water gun based on this design, you do so at your own risk. I’ve pressurized my water gun to the full pressure of my water supply and left it for several hours with no leaks or explosions, but there’s always the chance something might blow up.
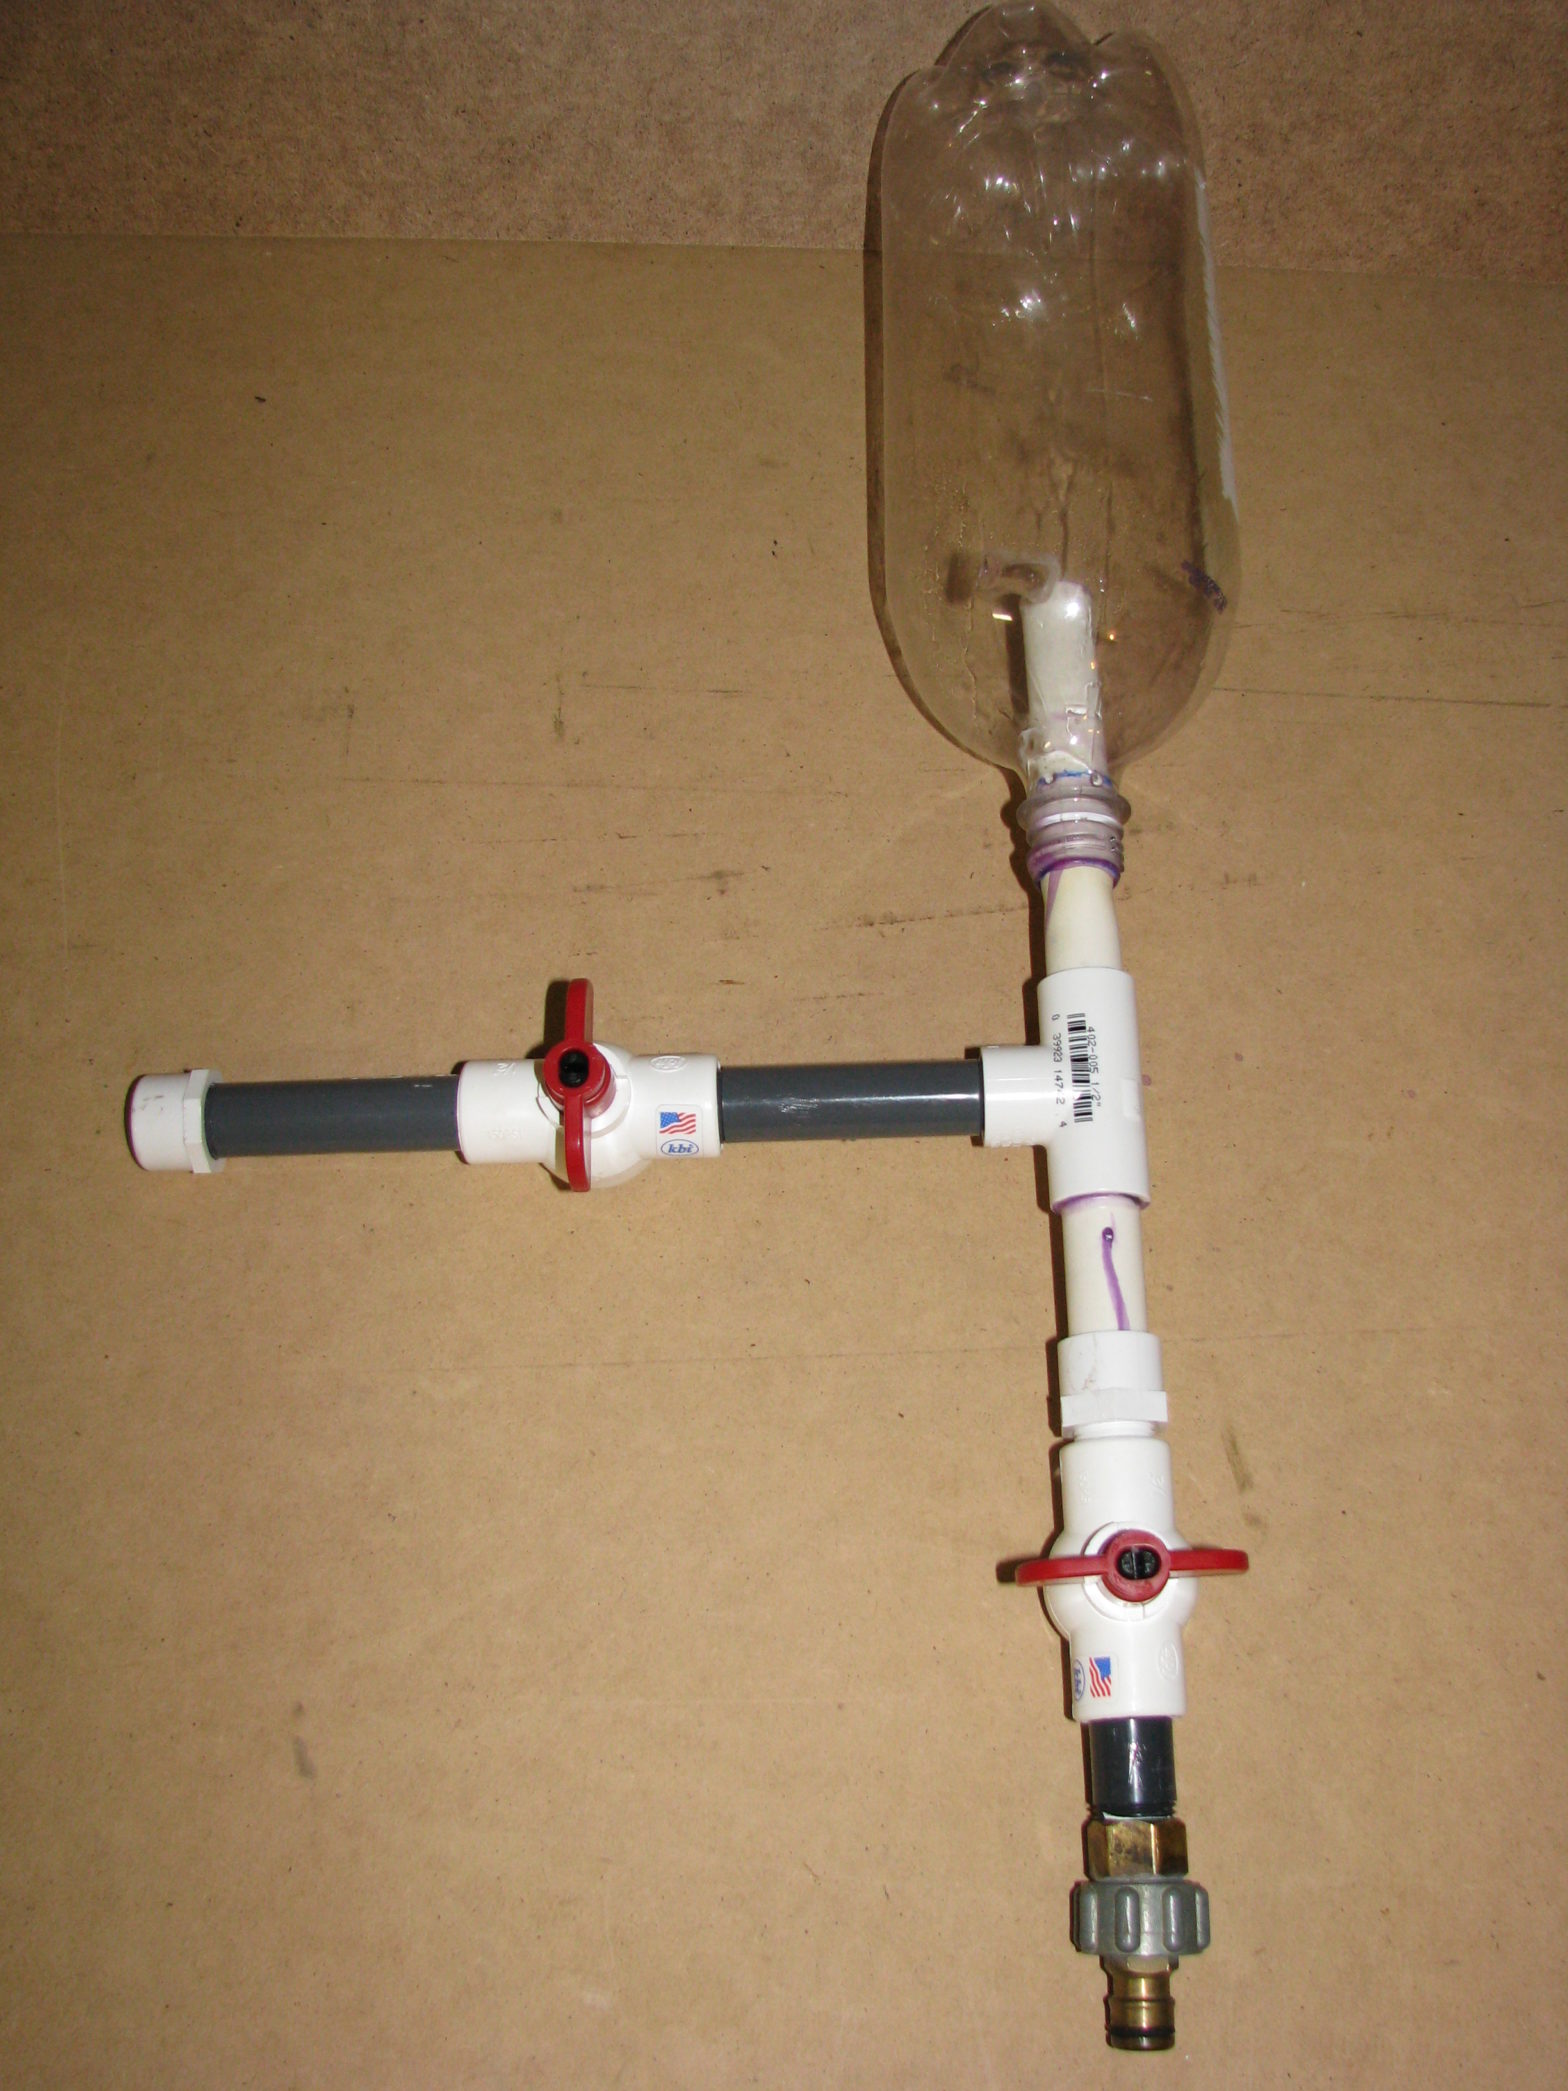
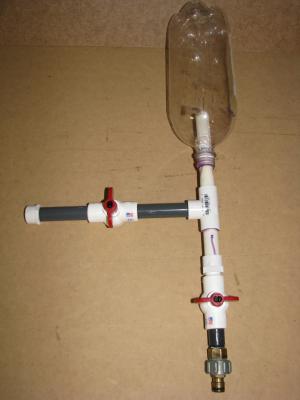
Step 1: Gather the materials
I used mostly threaded PVC connections so that I could replace parts or reconfigure the design, but you don’t have to. This parts list reflects the layout shown in the pictures. All PVC pieces are 1/2″ diameter.
- 2-liter soda bottle
- 6 inch piece of 1/2″ PVC
- 3 inch piece of 1/2″ PVC
- tee with threaded side outlet
- two 4 inch PVC nipples
- 2 inch PVC nipple
- threaded PVC cap
- two threaded ball valves
- garden hose adapter – hose to 1/2″ female threads (as seen here)
- 1/2″ male adapter – female slip to male threaded (as seen here)
- (optional) hose adapter quick connects
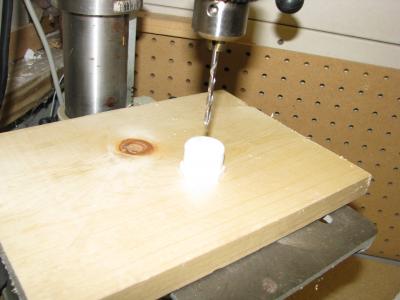
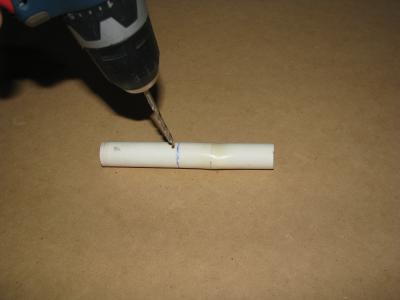
Step 2: Create the nozzle
The “nozzle” is just a small hole drilled in a PVC cap. A larger hole will produce a larger stream, but it won’t last very long between fills. Start with 1/16″ inch, and go bigger if you don’t like it.
Step 3: Put a “bulge” in the bottle adapter
Take the 6 inch piece of 1/2″ PVC and heat a section of it with a heat gun.
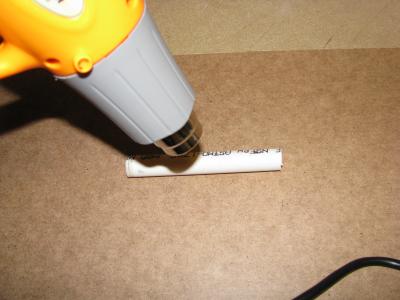
Once the plastic is softened, press the ends of the pipe together, which will cause the heated section to flare out.
Press the pipe tightly into the opening of the bottle and allow it to cool. If it’s not really tight, heat the pipe and compress it again.
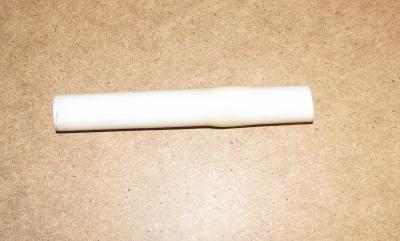
Step 4: Vent or trim the bottle adapter
The part of the bottle adapter pipe that protrudes into the bottle needs to be cut off or have holes drilled in it. For added strength, I left the pipe long and drilled some holes.
Mark around the rim of the bottle the bottle, and also the point on the pipe that is fully inside the bottle (on my bottle, it’s about 1-1/4 inches in).
Drill holes in the pipe on the 2nd line (the one that will be inside the bottle). These holes allow the water to drain from near the neck of the bottle into the plumbing.
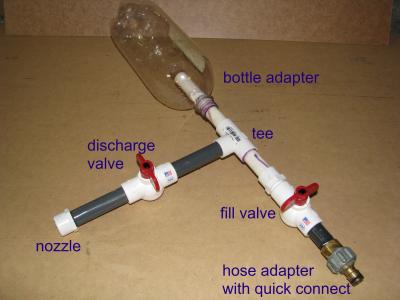
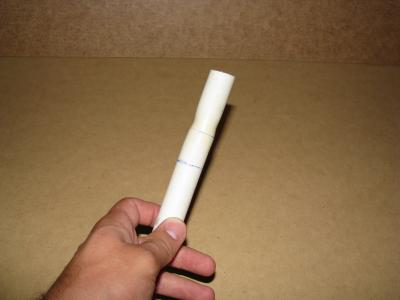
Step 4: Build the nozzle assembly
Starting with the tee in the middle (which has slip fittings on the ends and a threaded fitting in the middle), we’ll consider each leg of the tee a separate assembly.
Here’s the nozzle assembly. It consists of the nozzle (the threaded cap you drilled earlier), a 4 inch nipple, a threaded ball valve, another 4 inch nipple, then the tee. Assemble these pieces using teflon tape.
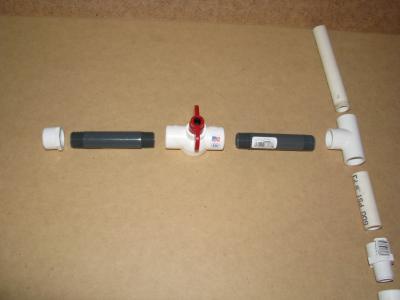
Step 5: Build the fill assembly
Next is the fill assembly. Starting with the tee, it consists of the following pieces: 3 inch PVC pipe, adapter (female slip to male threaded), threaded ball valve, 2 inch nipple, and 1/2 female hose adapter (1/2″ female threaded to garden hose). Assemble the threaded joints with teflon tape, then use PVC primer and cement to attach the PVC pipe to the tee and the adapter.

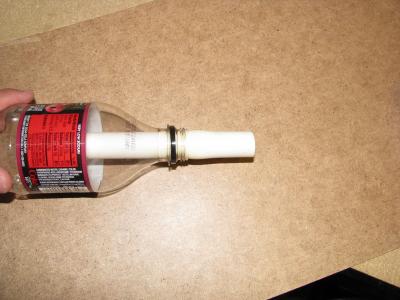
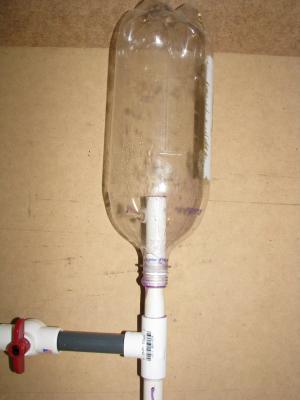
Step 6: Build the bottle attachment
Take the bottle adapter that you created earlier and cement it into the remaining leg of the tee. Also cement the bottle onto the adapter. The bottle isn’t made of PVC, but using the PVC cement seems to work.
Step 7: Wait!
Be patient. Give the PVC cement a couple of hours to set up. The plumbing is going to be under high pressure, so don’t cheat!
Ready, aim, fire!
Here’s a video of my lovely wife demonstrating:
Hey Korey,
Pulling this up for BlackBerry testing per your request. The embedded YouTube video is missing from this article, but I assume that is probably by design…everything else looks pretty good and clean…mobile friendly!
FYI, for reference purposes, I have the Storm with OS 5.0.0.328, which I believe is the latest update. The browser on here is a lot better than older BBs so you may want to check around at work for someone with a Pearl or Curve.
Mmm, water gun.
Now will you think of shooting it wearing a swimsuit? Gotta dig those gals in bikinis with weapons…
Nice hack, Korey.
very nice theme, I like this theme
Nice gun but a good idea is to replace the water Bottle with 4 inch PVC about 9 long.
Luke, you’re right. The only reason for the 2-liter bottle is cost savings.
I had the same thought as Luke. I will create the build with that, because I don’t really buy Soda, so I have no bottles. It’s also extremely unlikely to burst. However, it adds extra weight.